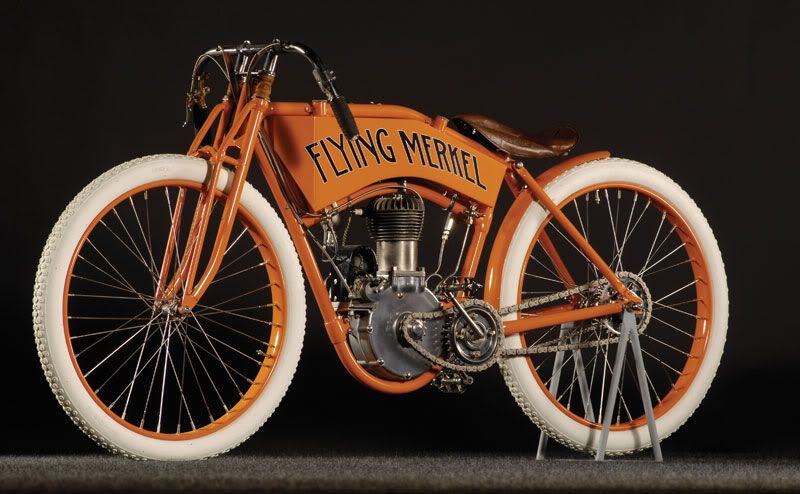
About a year back I decided I wanted to build a motorcycle from scratch. I've always liked the style of the old board trackers and when I came across the Flying Merkel I was hooked. I had to build one.... well my version at least. I definitely don't have the kind of money to build a replica but I think I can pull off a really nice tribute.
First was the inspiration.....
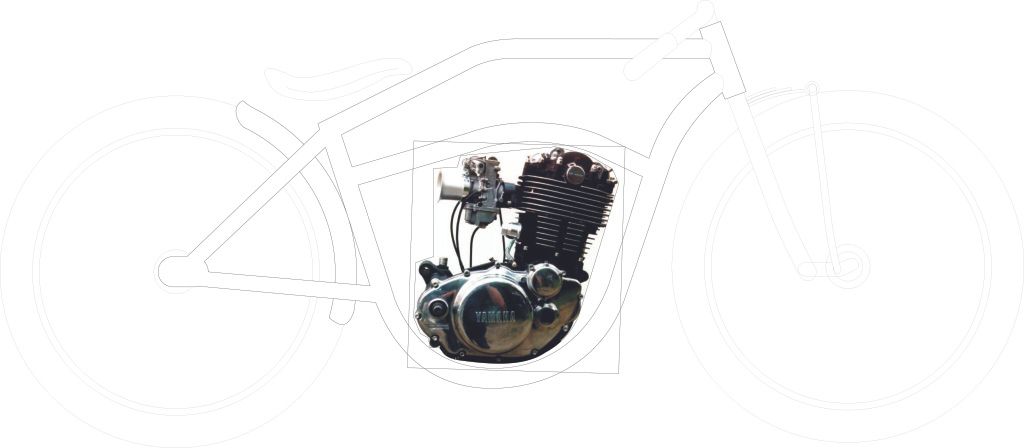
Second was the design. This is the first project where I've designed and had almost every part purchased or figured out prior to starting any fab work. It's much easier to change it on paper than steel. It took me nearly 6 months on and off to get everything worked out. This unfortunately is not my final drawing, but you get the picture... so to speak. It get's better, I had to start somewhere.
And finally the real work can begin.
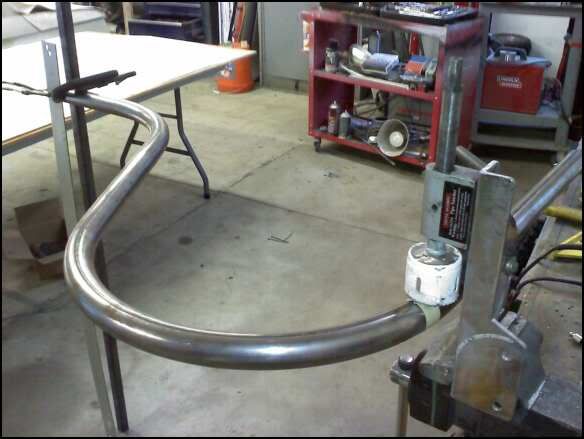
This is where the design work really paid off. I had to have a handrail company bend the lower hoop so I had to modify the radius to match their mandrel dies. Cost me $300 but it came out perfect. You can imagine how nervous I was making that first fishmouth with my cheap Chinese jig.
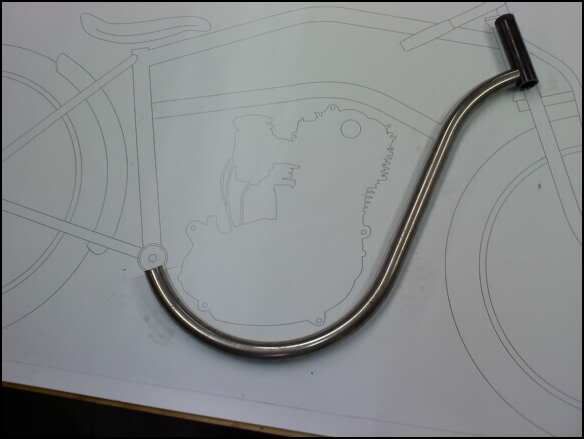
I couldn't have done it without the full size pattern. Glad I work at a sign company.
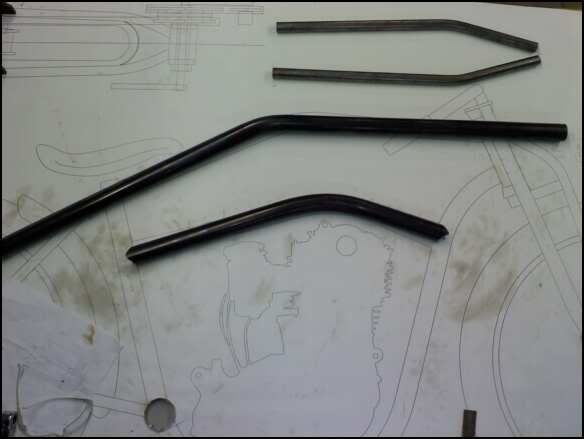
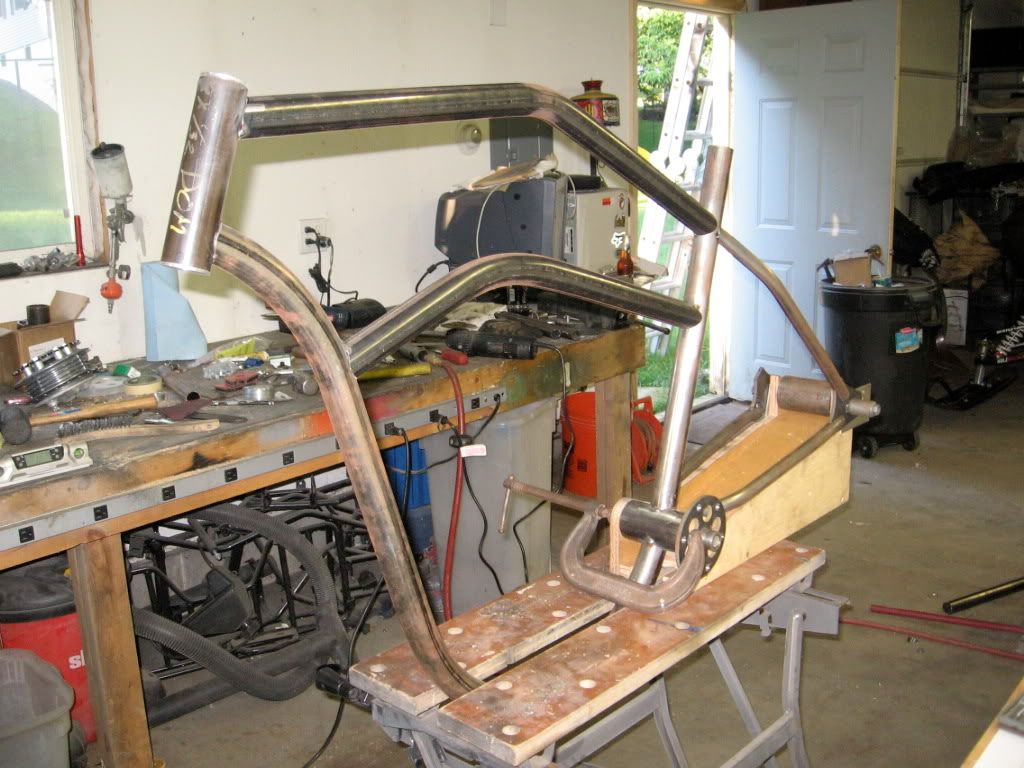
Top tube was bent on a friends hydraulic tubing bender the mid tube I bent on my Chinese pipe bender to get a larger radius. The other tubes are for the rear triangle... also bent on the cheapo pipe bender.
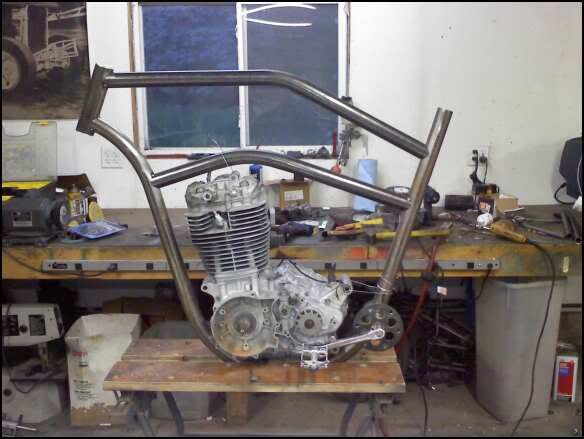
The motor I chose was a Yahama XT500 because they're single cylinder, the exhaust allows for a single down tube and I got a whole running bike with title for $300. **side note** The further I get into the project the more I question my motor choice but it's too late now. I may have to do some work to modify the look of the case and cylinder to fit the look. Should be enough power though.
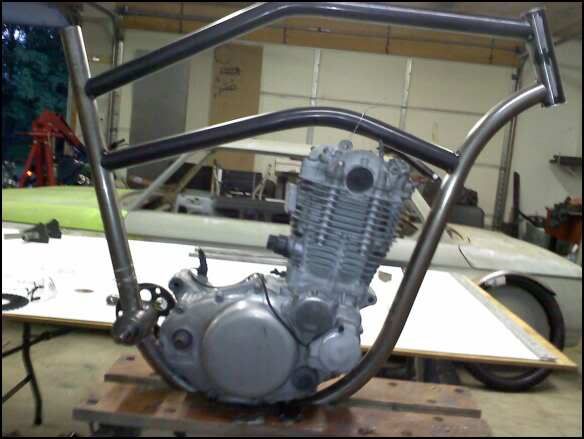
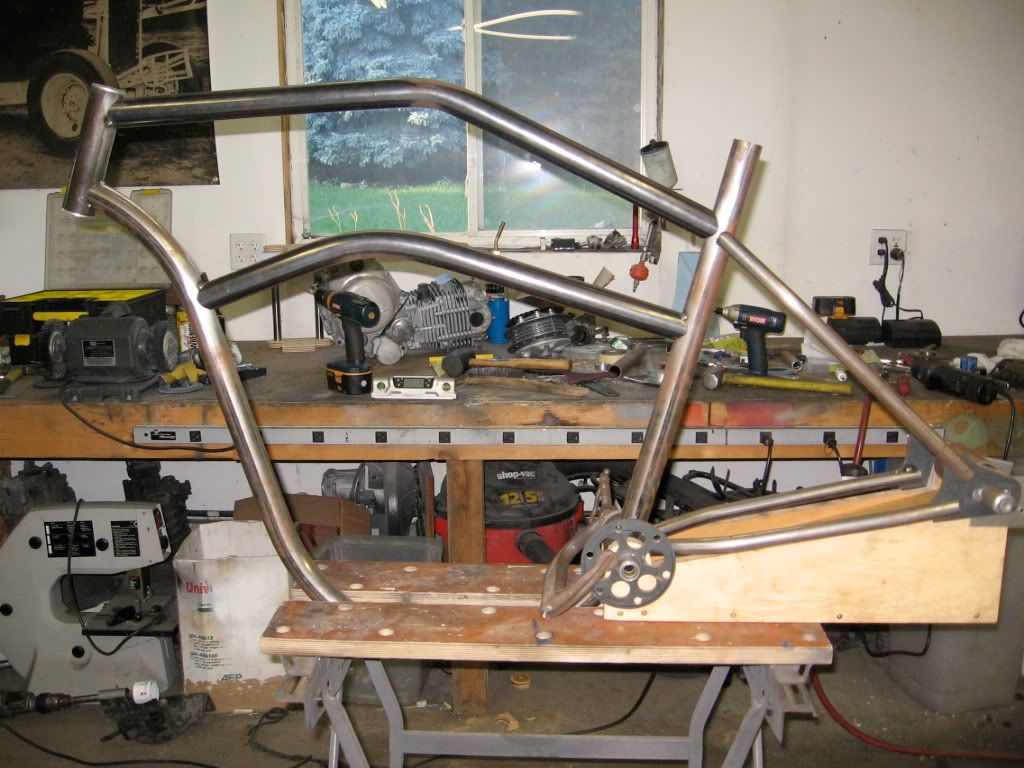
After tacking the hoop to the other main tubes I sat the engine in place to get the mid tube placement. Tack, check for straightness, repeat.
Getting the rear dropouts ready. Again, the use of a pattern is essential.
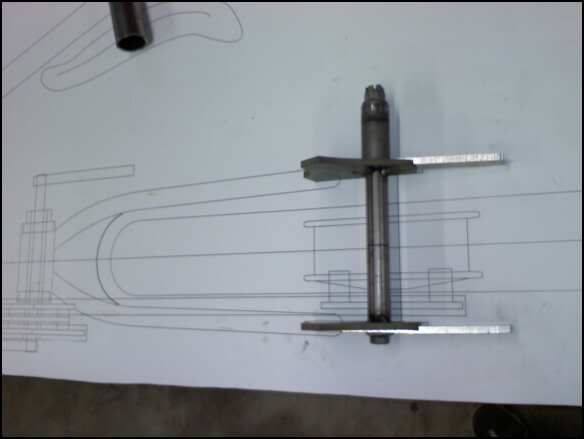
I made a jig on a CNC router to get my dropouts and rear triangle aligned perfectly to the main frame. I used the jackshaft in the bottom bracket as the mounting point. More on that later.

Here's a good place the throw in a thanks to my friend Tyler for hooking me with the waterjet dropouts and sprocket mounting ring on the jackshaft.... as well as other parts to be named later.
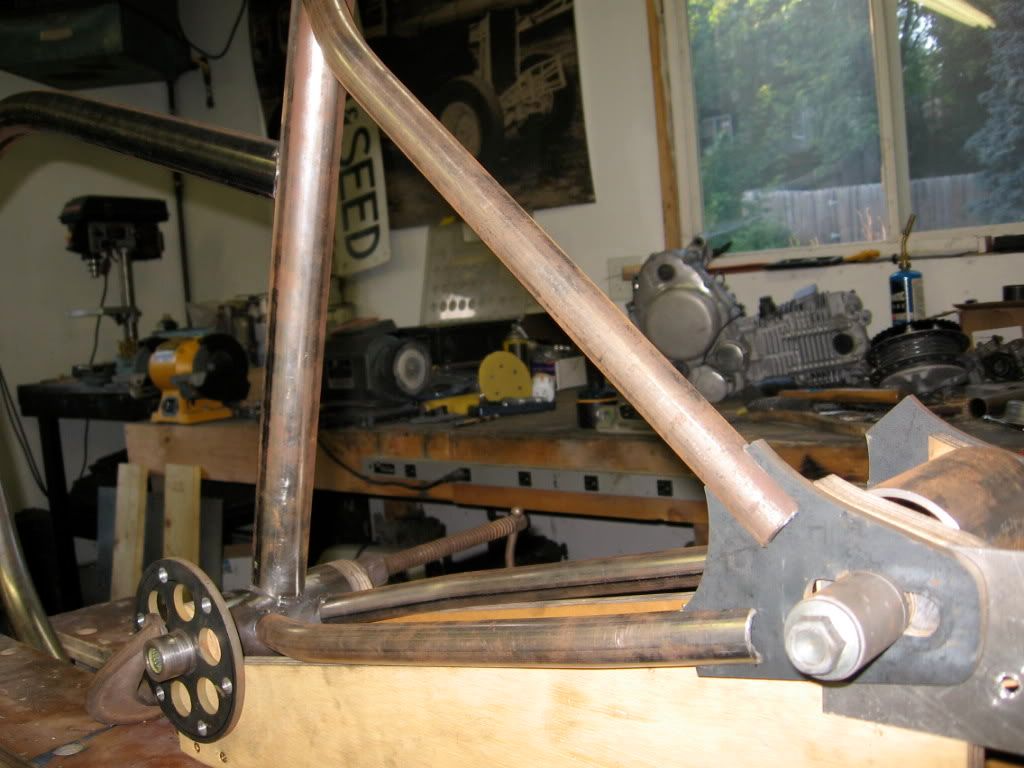
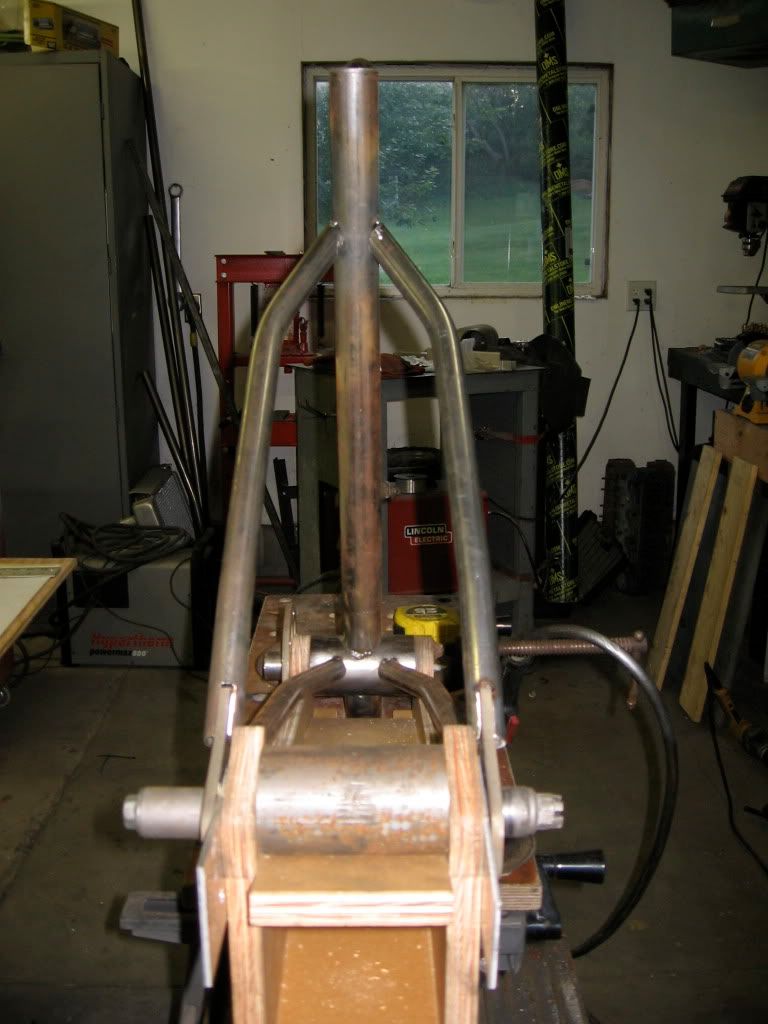
Even with the jig I was nervous about alignment so tack, check, tack, check and repeat.
More to come... I just want to get this first post out of the way.
Gnarly Adventurer
Joined: May 2009
Location: Minnesota
Oddometer: 167

First was the inspiration.....
Second was the design. This is the first project where I've designed and had almost every part purchased or figured out prior to starting any fab work. It's much easier to change it on paper than steel. It took me nearly 6 months on and off to get everything worked out. This unfortunately is not my final drawing, but you get the picture... so to speak. It get's better, I had to start somewhere.
And finally the real work can begin.
This is where the design work really paid off. I had to have a handrail company bend the lower hoop so I had to modify the radius to match their mandrel dies. Cost me $300 but it came out perfect. You can imagine how nervous I was making that first fishmouth with my cheap Chinese jig.
I couldn't have done it without the full size pattern. Glad I work at a sign company.
Top tube was bent on a friends hydraulic tubing bender the mid tube I bent on my Chinese pipe bender to get a larger radius. The other tubes are for the rear triangle... also bent on the cheapo pipe bender.
The motor I chose was a Yahama XT500 because they're single cylinder, the exhaust allows for a single down tube and I got a whole running bike with title for $300. **side note** The further I get into the project the more I question my motor choice but it's too late now. I may have to do some work to modify the look of the case and cylinder to fit the look. Should be enough power though.
After tacking the hoop to the other main tubes I sat the engine in place to get the mid tube placement. Tack, check for straightness, repeat.
Getting the rear dropouts ready. Again, the use of a pattern is essential.
I made a jig on a CNC router to get my dropouts and rear triangle aligned perfectly to the main frame. I used the jackshaft in the bottom bracket as the mounting point. More on that later.
Here's a good place the throw in a thanks to my friend Tyler for hooking me with the waterjet dropouts and sprocket mounting ring on the jackshaft.... as well as other parts to be named later.
Even with the jig I was nervous about alignment so tack, check, tack, check and repeat.
More to come... I just want to get this first post out of the way.
Builder
RebuilderGnarly Adventurer
Joined: May 2009
Location: Minnesota
Oddometer: 167

.jpg "Custom Bobber | Kawasaki W650 - Grease n Gasoline")


")
Thanks for sharing this new, advance information.. It's really amazing and give me a lot of information .. Please share me more.. it's really good. I hope you have more information about this article.. .. Thanks..!!!!!Custom Sign Design
ReplyDelete